
Peace Lily
When it comes to indoor plants that bring both serenity and beauty to your space, the peace lily stands out as a popular choice. With its graceful white blooms and air-purifying capabilities, this plant has captured the hearts of many plant enthusiasts. In this comprehensive guide, we’ll delve into the world of peace lilies, from understanding their needs to nurturing their growth.
Table of Contents
- Introduction
- The Beauty of Peace Lilies
- Choosing the Right Spot
- Creating the Ideal Environment
- Watering Wisdom
- Fertilizing for Flourishing
- Pruning and Maintenance
- Re-potting with Care
- Dealing with Potential Issues
- Propagation Pointers
- Decorating with Peace Lilies
- Frequently Asked Questions
- Conclusion
Introduction
The peace lily, scientifically known as Spathiphyllum, is more than just a plant; it’s a symbol of tranquility and purity. With its glossy, dark green leaves and elegant white flowers, it can effortlessly enhance the aesthetics of any indoor space.
The Beauty of Peace Lilies
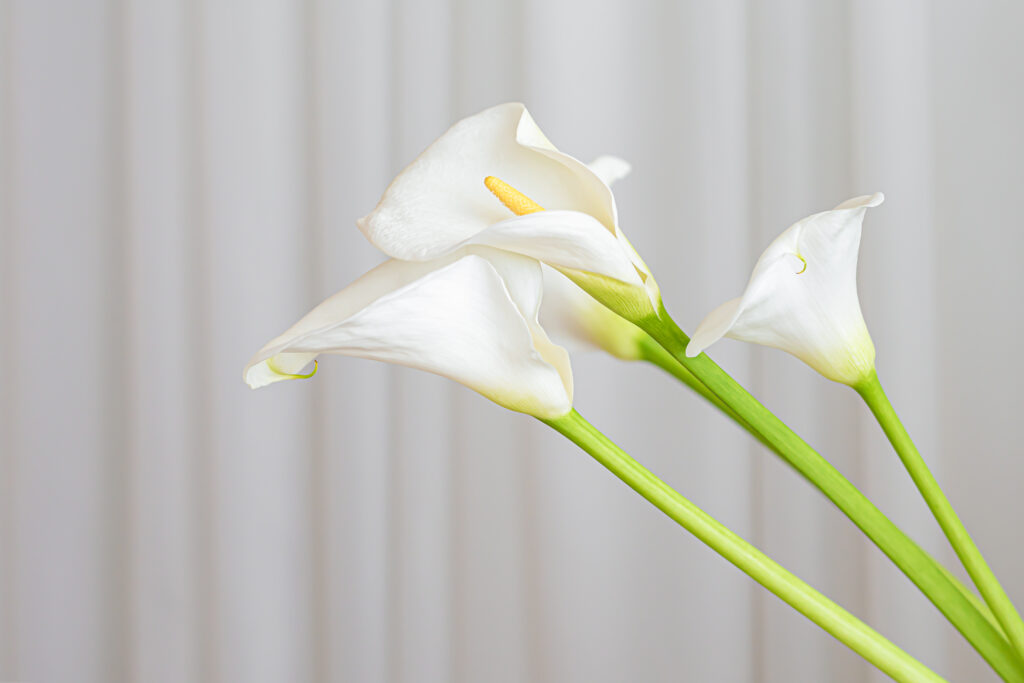
- Graceful White Blooms
The pristine white blooms of peace lilies are truly a sight to behold. With an almost ethereal quality, these delicate flowers seem to float above the plant’s lush foliage. Their velvety texture and graceful form give them an almost angelic appearance, evoking a sense of purity and innocence.
Enigmatic Fragrance
While peace lilies are not known for their strong fragrance, they do emit a subtle, pleasing scent. This mild fragrance adds an enigmatic touch to their charm, inviting you to come closer and appreciate their beauty on multiple sensory levels. It’s a gentle reminder that beauty can be found not only in sight but also in the subtle fragrances that nature provides.
- Greenery and Serenity
The lush, dark green leaves of peace lilies contribute to their overall beauty in a unique way. Their glossy surface reflects light, creating a play of shadows and highlights that adds depth and dimension to their appearance. These leaves also symbolize growth and life, reminding us of the natural cycle of renewal that takes place within the plant kingdom.
- Versatility in Décor
Whether your interior style is minimalist, modern, bohemian, or classic, peace lilies have the remarkable ability to blend seamlessly into various decorative themes. Their neutral color palette and timeless elegance allow them to serve as versatile decor elements that enhance the ambiance of any room. Placed on shelves, tables, or even suspended in hanging baskets, they add a touch of sophistication to their surroundings.
- Resilience and Longevity
The longevity of peace lilies adds to their allure. With proper care, these plants can thrive for many years, becoming cherished companions in your living space. Their ability to withstand varying conditions and bounce back from occasional neglect demonstrates their resilience, serving as a testament to the enduring beauty of nature.
- Reflecting Light and Energy
Peace lilies possess an innate ability to capture and reflect light. Their leaves seem to shimmer and come to life as sunlight dances upon them. This interplay of light and shadow not only adds dynamism to their appearance but also creates a captivating display that can transform an ordinary corner into a radiant focal point.
- Calming Aesthetics
In a world filled with constant stimuli and fast-paced lifestyles, the tranquil aesthetics of peace lilies provide a soothing contrast. Their gentle presence exudes calmness and encourages a moment of pause, allowing you to take a breath and appreciate the simple yet profound beauty that exists in the world around us.
“The Beauty of Peace Lilies” extends far beyond their physical appearance. It encompasses their symbolism, adaptability, and the way they touch our senses and emotions. These plants are a testament to the intricate artistry of nature and its ability to bring solace, inspiration, and a sense of wonder into our lives. As you welcome a peace lily into your space, you invite not only a remarkable plant but also a source of tranquility and timeless elegance.
Choosing the Right Spot

To ensure your peace lily thrives, choose a spot with bright, indirect sunlight. While they can tolerate lower light conditions, placing them near a north-facing window is ideal. Direct sunlight can scorch their leaves, so it’s important to strike the right balance.
- Ideal Lighting Conditions
Selecting the right spot with appropriate lighting conditions is paramount for the well-being of your peace lily. While peace lilies can tolerate low light, they truly thrive in bright, indirect light. Placing them near a north-facing window is an excellent choice, as it provides the necessary light without subjecting the plant to direct sunlight, which can scorch its leaves.
- Indirect Sunlight Benefits
Opting for indirect sunlight has multiple benefits for your peace lily. It mimics the plant’s natural habitat, where it grows beneath the canopy of larger trees. This filtered light not only prevents leaf burn but also allows the plant to receive the energy it needs for photosynthesis without undergoing stress.
- Finding the Balance
In situations where bright, indirect light is not readily available, peace lilies can adapt to lower light conditions, making them versatile choices for various indoor environments. However, be cautious not to place them in extremely dim corners where they might struggle to photosynthesize effectively.
- Avoiding Direct Sun Exposure
While peace lilies appreciate light, they are sensitive to direct sunlight, which can lead to leaf damage. Direct sunlight can scorch their leaves, causing brown patches that detract from their beauty. Shield them from the harsh midday sun and avoid placing them near windows where the sun’s rays are intense.
- Monitoring Light Changes
Remember that lighting conditions can vary throughout the year due to seasonal changes and the sun’s angle. Observing how the light moves within your space and making slight adjustments to your peace lily’s placement can help maintain the ideal balance between light and shade.
- Making Your Home Comfortable
When choosing the right spot for your peace lily, consider your home’s overall comfort. Avoid exposing the plant to drafts from heaters, air conditioners, or open windows. Drastic temperature fluctuations can stress the plant, affecting its growth and overall health.
- Aesthetic Integration
While prioritizing the plant’s needs, also take into account the aesthetics of your space. Placing your peace lily in a location where it enhances the visual appeal of the room can create a harmonious blend of nature and interior design.
Selecting the perfect spot for your peace lily is about more than just finding a space with adequate light. It’s a balance between the plant’s requirements, your home’s environment, and your personal style. By providing your peace lily with the right lighting conditions, you lay the foundation for a healthy and thriving plant that will bring both elegance and tranquility to your living space.
Creating the Ideal Environment
Peace lilies prefer a warm and humid environment, mimicking their natural tropical habitat. Regular misting or placing the pot on a tray with water and pebbles can help maintain the required humidity levels. Keeping them away from drafts and sudden temperature fluctuations is equally crucial.
- Watering Wisdom
Over-watering or under-watering can stress your peace lily. Check the top inch of the soil, and when it feels dry, it’s time to water. Ensure the pot has proper drainage to prevent root rot. Yellowing leaves can be a sign of over-watering, while drooping leaves indicate the need for hydration.
- The Art of Watering
Mastering the art of watering is essential when caring for your peace lily. Proper hydration is key to its well-being, but over-watering or under-watering can lead to stress and potential damage.
- Soil Moisture Check
Before watering, always check the moisture level of the soil. Stick your finger about an inch into the soil; if it feels dry, it’s time to water. If it still feels moist, hold off for a few days. This practice prevents both over-watering, which can lead to root rot, and under-watering, which can cause stress and wilting.
- Balanced Hydration
When watering your peace lily, aim for a balanced approach. Water thoroughly, allowing water to seep out of the pot’s drainage holes. But avoid letting the plant sit in standing water, as this can suffocate the roots. Discard any excess water that collects in the saucer beneath the pot.
- Frequency and Consistency
The frequency of watering depends on various factors, including the size of the pot, the humidity of the environment, and the time of year. In general, peace lilies prefer to be kept slightly moist, so water them when the top inch of soil feels dry to the touch. Establish a consistent watering routine to help the plant thrive.
- Signs of Under-watering
If your peace lily’s leaves are drooping and the soil is dry, it’s a sign that the plant is thirsty. Give it a good soak, ensuring water reaches the roots. Within a few hours, you’ll likely notice the leaves perking up, indicating that the plant is absorbing the moisture it needs.
- Signs of Over-watering
Yellowing leaves, especially if they’re turning mushy, can indicate over-watering. Excessive moisture can suffocate the roots and promote the growth of harmful pathogens. If you suspect over-watering, allow the soil to dry out before watering again and consider adjusting your watering routine.
- Using the Right Water
The quality of water you use matters. Preferably, use room temperature, filtered water or tap water that has been left out for a day to allow chlorine to dissipate. Avoid using water that’s too cold or water that contains high levels of minerals, which can accumulate in the soil over time.
- Adjusting for Seasons
Remember that your peace lily’s watering needs can change with the seasons. During its active growing period (spring and summer), it might require more frequent watering. In the dormant months (fall and winter), you can reduce the frequency to prevent waterlogged soil.
“Watering Wisdom” is an essential skill to cultivate as you care for your peace lily. By understanding the plant’s moisture requirements, reading its cues, and providing balanced hydration, you ensure its vitality and longevity. With patience and practice, you’ll develop the knack for knowing exactly when and how much to water, contributing to the health and beauty of your cherished peace lily.
Fertilizing for Flourishing

During the growing season (spring and summer), feed your peace lily with a balanced liquid fertilizer every 6-8 weeks. However, it’s important not to over-fertilize, as this can lead to a build-up of salts in the soil. In the dormant season, reduce the frequency of fertilization.
- Nutrient Boost
Fertilization plays a crucial role in providing your peace lily with the essential nutrients it needs to thrive. While these plants are relatively low-maintenance, supplying them with the right nutrients can significantly enhance their growth, flowering, and overall health.
- Choosing the Right Fertilizer
Selecting the appropriate fertilizer is key to promoting your peace lily’s well-being. Opt for a balanced, water-soluble fertilizer with equal amounts of nitrogen (N), phosphorus (P), and potassium (K). Look for a formula with a ratio of 20-20-20 or similar.
- Seasonal Timing
Timing is essential when it comes to fertilization. During the active growing season, which typically spans from spring to early fall, your peace lily will benefit most from regular fertilizing. Aim to fertilize once every 6-8 weeks to ensure a consistent supply of nutrients.
- Dilution and Application
When applying fertilizer, follow the instructions on the packaging for dilution and application. It’s better to err on the side of caution and slightly under-fertilize rather than risk over-fertilization, which can lead to a buildup of salts in the soil.
- Gentle Approach
Peace lilies are not heavy feeders, and excessive fertilization can cause harm. A gentle, measured approach is best. Remember that less is often more when it comes to fertilizing these plants. A diluted solution applied with care can yield remarkable results.
- Flushing the Soil
To prevent the accumulation of excess salts in the soil, which can hinder nutrient absorption and lead to root damage, it’s a good practice to periodically flush the soil. This involves watering the plant thoroughly to help leach out any built-up salts.
- Signs of Over-Fertilization
Keep an eye out for signs of over-fertilization, such as browning leaf tips, stunted growth, or a white crust on the surface of the soil. If you notice these symptoms, it’s advisable to flush the soil with water and adjust your fertilization schedule.
- Tailoring to Growth
As your peace lily matures, its fertilization needs might change. Younger plants or those in active growth stages will benefit more from frequent fertilization, while more mature plants or those in a dormant phase can have reduced fertilization needs.
- Organic Alternatives
If you prefer an organic approach, you can use natural alternatives like compost tea or diluted fish emulsion as fertilizers. These options can provide your peace lily with nutrients while adhering to an environmentally friendly gardening approach.
“Fertilizing for Flourishing” is an essential aspect of peace lily care that can significantly impact the plant’s growth, health, and ability to produce its iconic white blooms. By understanding the importance of balanced nutrients, choosing the right fertilizer, and tailoring your approach to the plant’s growth stage, you’ll be able to create an optimal environment that nurtures the flourishing beauty of your peace lily.
Pruning and Maintenance
Regularly remove yellow or brown leaves to maintain the plant’s vitality. Additionally, trimming spent flowers can encourage new blooms. Wiping the leaves with a damp cloth not only keeps them clean but also helps them breathe by removing dust.
- Promoting Health and Aesthetics
Pruning and maintenance are essential aspects of peace lily care that contribute to both the plant’s overall health and its visual appeal. By removing spent blooms, yellowing leaves, and occasional straggly growth, you create a well-groomed plant that radiates vitality.
- Removing Spent Blooms
As the beautiful white blooms of your peace lily fade, it’s beneficial to remove them to encourage new growth. This process redirects the plant’s energy from seed production back into strengthening its root system and producing new leaves and flowers.
- Addressing Yellowing Leaves
Yellowing leaves are a natural part of a peace lily’s life cycle, but they can also signal issues such as overwatering, nutrient deficiencies, or insufficient light. Promptly removing yellowing leaves not only improves the plant’s aesthetics but also helps you identify and address underlying problems.
- Trimming Straggly Growth
Occasionally, your peace lily may develop straggly or leggy growth, where stems become elongated and the plant loses its compact shape. Pruning back these longer stems encourages the plant to grow more compactly, creating a neater and more visually pleasing appearance.
- Deadheading for Continuous Blooms
Deadheading, or removing spent flowers, can extend the flowering period of your peace lily. By preventing the plant from expending energy on producing seeds, you encourage it to focus on generating new buds and blooms.
- Sterilizing Pruning Tools
When pruning your peace lily, it’s crucial to use clean and sterilized pruning tools to prevent the spread of diseases. You can disinfect your tools with rubbing alcohol or a diluted bleach solution between cuts.
- Regular Inspection
Incorporate regular inspections into your peace lily care routine. Take a close look at the undersides of leaves for signs of pests or diseases, as catching and addressing issues early can prevent them from spreading and causing significant damage.
- Cleaning and Dusting
Dust can accumulate on your peace lily’s leaves, hindering its ability to perform photosynthesis. Gently wipe the leaves with a damp cloth to remove dust and improve the plant’s ability to absorb light and breathe.
- Encouraging Air Circulation
Pruning and maintaining your peace lily can also involve creating an environment that promotes air circulation. This reduces the risk of fungal diseases and pest infestations by preventing moisture from getting trapped in dense foliage.
“Pruning and Maintenance” are more than just grooming tasks; they’re vital steps in nurturing your peace lily’s growth and well-being. By regularly tending to your plant, removing spent blooms, addressing issues promptly, and fostering a healthy environment, you not only ensure its long-term health but also create a stunning, flourishing centerpiece that enhances the aesthetics of your space.
Re-potting with Care
Peace lilies prefer to be slightly root-bound, so re pot only when the roots have outgrown the current pot. This usually happens every 2-3 years. Use a well-draining potting mix and choose a pot that’s one size larger than the current one.
- Knowing When to Re-pot
Re-potting is a crucial aspect of peace lily care that allows the plant to thrive and continue its growth journey. As your peace lily grows, its roots might outgrow the current pot, leading to a lack of space for proper nutrient absorption. It’s generally recommended to re pot every 2-3 years, or when you notice the plant becoming root-bound.
- Signs of Root-Bound Plants
Observe the signs that your peace lily might be root-bound. If the plant’s growth has slowed down, it’s struggling to absorb water, or you notice roots circling around the bottom of the pot, it’s likely time for a larger home.
- Choosing the Right Pot
Select a new pot that is one size larger than the current one. Opt for a pot with drainage holes to prevent water from pooling at the bottom and causing root rot. A slightly larger pot provides the plant with more room to spread its roots and access the nutrients it needs.
- Fresh Soil Mix
When re-potting, use a well-draining potting mix that provides a good balance of moisture retention and aeration. You can use a mixture of peat moss, per-lite, and pine bark to create an ideal growing medium for your peace lily.
- Gently Removing the Plant
Carefully remove the peace lily from its current pot, being mindful not to damage the roots. Gently loosen the roots if they’re tightly bound, which encourages them to spread out in the new pot.
- Pruning and Root Trimming
During re potting, it’s a good opportunity to inspect the roots and prune any that are unhealthy or excessively long. Trimming the roots can help stimulate new growth and prevent them from becoming too tangled.
- Transplanting with Care
Place the peace lily in the new pot at the same depth it was planted before. Fill in the gaps with fresh potting mix and gently press down to ensure there are no air pockets around the roots.
- Watering After Re-potting
After re potting, water your peace lily thoroughly to settle the soil and provide the roots with the moisture they need. Ensure that excess water drains out of the pot to prevent water-logging.
- Post-Re-potting Care
For a few weeks after re-potting, keep an eye on your peace lily’s condition. Provide it with adequate light and moisture to help it recover from the stress of transplantation.
“Re-potting with Care” is a critical step in maintaining the health and vitality of your peace lily as it continues to grow and flourish. By recognizing the signs of root-boundless, choosing the right pot and soil, and approaching the process with gentle care, you give your peace lily the space it needs to continue its graceful journey of growth and beauty.
Dealing with Potential Issues

Pest Infestations: Keep an eye out for pests like spider mites and mealybugs. Regularly inspect the undersides of leaves and treat infestations promptly.
- Pest Infestations
Spider Mites: These tiny pests can cause stippling and discoloration on your peace lily’s leaves. To deal with spider mites, rinse the leaves with a strong jet of water, increase humidity, and consider using insecticidal soap if the infestation persists.
Mealybugs: Mealybugs appear as white, cotton-like masses on the plant. Remove them manually with a cotton swab dipped in rubbing alcohol or a solution of water and mild soap. Regularly inspect your plant for signs of these pests.
- Brown Tips and Edges
Brown leaf tips or edges can result from several factors, including low humidity, excessive fertilizer, or inconsistent watering. To address this issue, maintain a humid environment, avoid over-fertilization, and ensure you’re watering your peace lily appropriately.
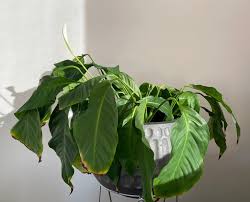
- Drooping Leaves
Drooping leaves can indicate both over-watering and under-watering. Check the soil moisture and adjust your watering routine accordingly. Remember that wilting leaves can recover quickly after proper hydration.
- Yellowing Leaves
Yellowing leaves can be a sign of stress caused by various factors, such as improper lighting, over-watering, or nutrient deficiencies. Assess your plant’s conditions and make adjustments as needed, such as relocating it to a spot with better lighting or adjusting your watering routine.
- Root Rot
Root rot is a fungal disease caused by overly wet conditions. To prevent root rot, ensure proper drainage, avoid waterlogged soil, and provide well-aerated conditions. If root rot is suspected, remove the affected portions and repot the plant in fresh soil.
- Browning of Blooms
If the beautiful white blooms of your peace lily are turning brown prematurely, it might be due to excessive exposure to direct sunlight or cold drafts. Move your plant away from such conditions and trim the browned portions to encourage new growth.
- Yellowing of Blooms
Yellowing of peace lily blooms can be a natural part of their life cycle. As the plant ages, the bracts might gradually change color. However, if the yellowing is accompanied by other signs of stress, evaluate the plant’s overall health and care routine.
- Leaf Spots
Leaf spots can be caused by various factors, including bacterial or fungal infections. To address leaf spots, remove affected leaves, ensure good air circulation, and avoid overhead watering, which can spread diseases.
“Dealing with Potential Issues” is an important aspect of peace lily care that ensures the plant’s health and longevity. By being vigilant and proactive in addressing problems such as pests, discoloration, and wilting, you can provide the best possible care for your peace lily and enjoy its beauty for years to come. Regular monitoring, proper care adjustments, and quick interventions when needed will contribute to a thriving and vibrant plant.
Propagation Pointers
Propagating peace lilies can be done through division. During re-potting, carefully separate the plant into smaller clumps, ensuring each division has healthy roots. This not only gives you new plants but also keeps the parent plant healthy.
- Division Propagation
Division: Propagating peace lilies through division is a popular method that involves separating the plant into smaller clumps, each with its own set of roots and foliage. This not only helps you create new plants but also rejuvenates the parent plant.
- Ideal Timing
Active Growth: The best time to propagate peace lilies through division is during their active growth period, which typically falls in spring or early summer. This is when the plant is most responsive to the process and has the energy to establish new roots.
- Selecting a Mature Plant
Parent Plant: Choose a mature peace lily with multiple shoots and a healthy root system for division. A well-established plant is more likely to thrive after being separated.
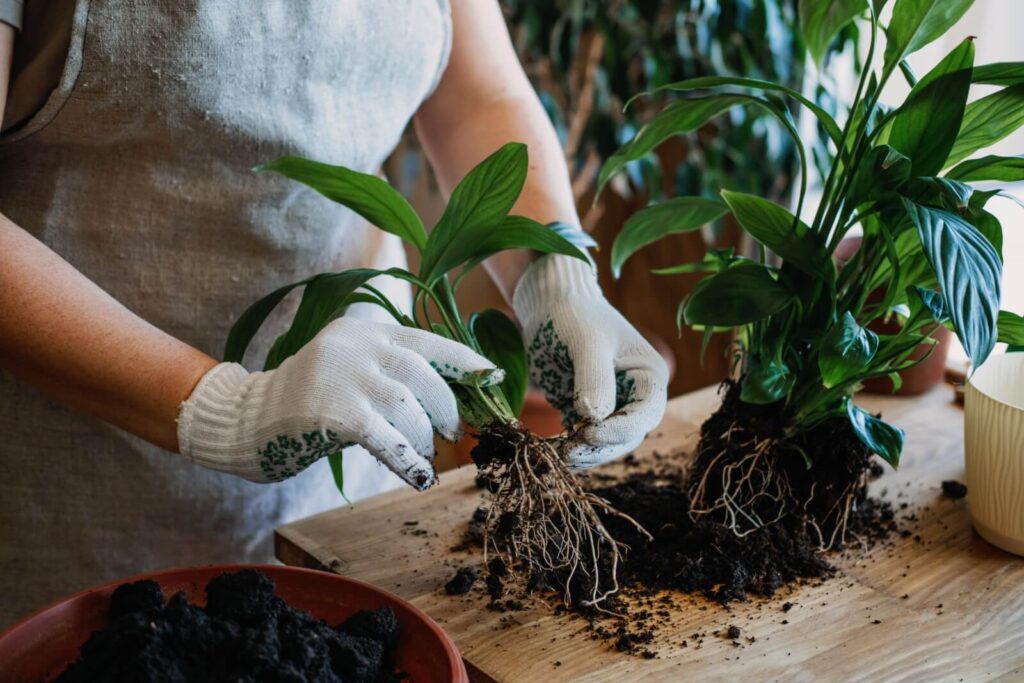
- Dividing the Plant
Step-by-Step: Carefully remove the peace lily from its pot and gently shake off excess soil. Using clean and sharp gardening tools, divide the plant into smaller sections. Each section should have at least a few leaves and a portion of the root system.
- Pruning and Trimming
Leaf and Root Trimming: Trim any damaged or excessively long roots, and also trim any leaves that are large or overly straggly. This helps balance the plant’s growth and reduces stress during the propagation process.
- Re-potting the Divisions
New Pots: Plant each divided section into its own pot filled with fresh potting mix. Water the divisions thoroughly after re-potting to help them establish in their new homes.
- Caring for New Plants
Nurturing: Place the new divisions in a bright but indirect light location. Keep the soil consistently moist but not waterlogged. Mist the leaves or use a humidity tray to help the divisions cope with the transition.
- Patience in Growth
Establishment Period: It’s normal for the newly propagated divisions to experience some stress and possibly a period of slow growth as they adapt to their new environment. Be patient and provide consistent care.
- Monitoring Progress
Signs of Success: As the new divisions start to grow, you’ll notice new leaves emerging from the center. This is a sign that they have established roots and are on their way to becoming mature peace lilies.
- Sharing the Joy
Gifts and Decor: Propagating peace lilies not only expands your plant collection but also allows you to share the joy of these beautiful plants with friends and family. The new divisions can be potted up and gifted or used to enhance your own living space.
“Propagation Pointers” offer you the opportunity to create new life from your existing peace lily while promoting the vitality of the parent plant. By understanding the process of division, providing proper care to the new divisions, and embracing the journey of growth, you’ll find satisfaction in nurturing new life and expanding your connection to the captivating world of peace lilies.
Decorating with Peace Lilies
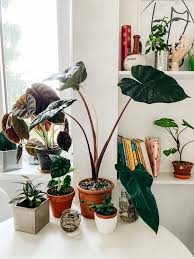
Aside from their air-purifying qualities, peace lilies make stunning decor elements. Place them in decorative pots that match your interior style, and let their timeless beauty elevate your space.
- Natural Elegance
Peace lilies bring a touch of natural elegance to any room. Their lush green foliage and iconic white blooms create a visually striking contrast that adds sophistication to your decor.
- Focal Points
Use peace lilies as focal points in your interior design. Place them on coffee tables, side tables, or shelves to draw the eye and create a captivating centerpiece that anchors the room.
- Hanging Displays
Consider hanging peace lilies in decorative planters or macramé hangers. This not only saves space but also adds a dynamic element to your decor by bringing plants to eye level.
- Vertical Gardens
Create a stunning vertical garden by arranging multiple peace lilies in a vertical row or pattern. This innovative display adds depth to your walls and infuses your space with a fresh, vibrant feel.
- Tablescapes
Incorporate peace lilies into your tablescapes for special occasions. Use them as elegant centerpieces during dinner parties, weddings, or other gatherings, adding a touch of natural beauty to the festivities.
- Entrance Statements
Welcome guests with the serene presence of peace lilies. Place them near your entrance or foyer to set a calming tone as people step into your home.
- Reading Nooks
Enhance your reading nook or home office with the soothing aura of peace lilies. Their presence can help create a tranquil environment, making it an ideal space for relaxation and focus.
- Bathroom Sanctuaries
Transform your bathroom into a spa-like sanctuary by placing peace lilies on countertops or shelves. Their love for humidity makes them perfect for this environment, adding a touch of nature to your self-care routine.
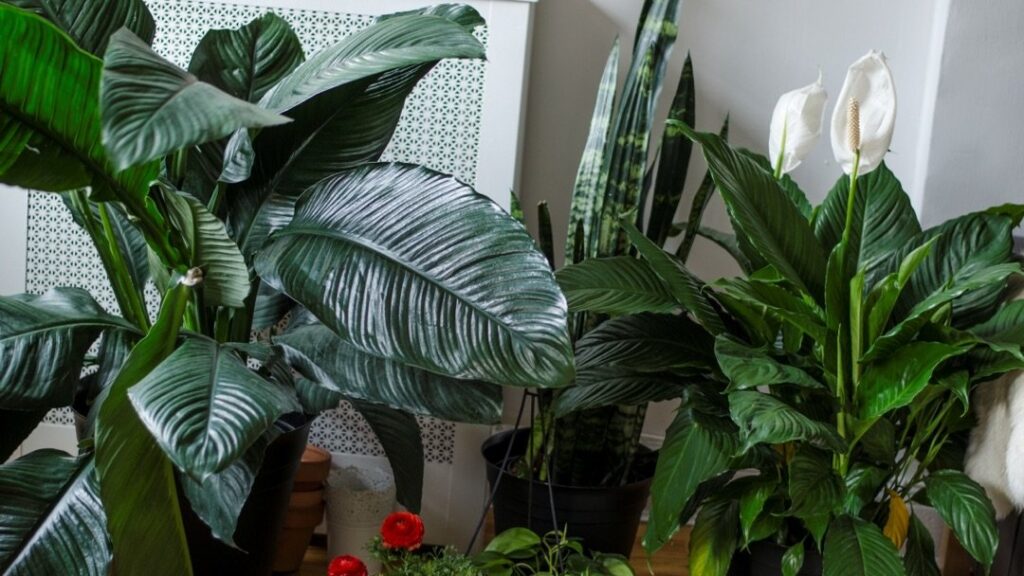
- Mix and Match
Combine peace lilies with other indoor plants to create a diverse and visually appealing indoor jungle. The different textures and shades of green can create a harmonious and relaxing atmosphere.
- Wall Niches
Utilize wall niches or alcoves to showcase peace lilies. These unique spots provide an opportunity to integrate plants into your decor in unexpected and delightful ways.
“Decorating with Peace Lilies” is an art that allows you to infuse your living space with beauty, tranquility, and natural charm. By strategically placing these graceful plants in various corners of your home, you create a harmonious atmosphere that both captivates and soothes the senses. Whether used as standalone accents or incorporated into intricate designs, peace lilies bring a touch of elegance and serenity to every room they grace.
Conclusion
Incorporating a peace lily into your indoor space not only adds a touch of elegance but also purifies the air and promotes a sense of calm. By following the care guidelines and providing the right conditions, you can enjoy the beauty of these plants for years to come.
Frequently Asked Questions
Q1: Can peace lilies tolerate low light?
A: Yes, peace lilies can thrive in low light conditions, but they prefer bright, indirect light.
Q2: How often should I mist my peace lily?
A: Misting 2-3 times a week is usually sufficient to maintain the required humidity.
Q3: Are peace lilies toxic to pets?
A: Yes, peace lilies are toxic if ingested by pets. Keep them out of reach.
Q4: Can I place my peace lily outdoors?
A: Peace lilies are meant for indoor environments. Direct sunlight can damage their leaves.
Q5: Why are the leaves turning yellow?
A: Yellowing leaves can result from over watering or exposure to direct sunlight.